Honeywell Hot Water Heater Status Light Blinking – Fix
You rely on your hot water heater daily to provide comfortable bathing, cleaning, and washing. So when you notice the status light on your Honeywell unit intermittently blinking, it’s unsettling.
Honeywell Hot Water Heater Status Light Blinking – Fix

The good news is that blinking light codes provide diagnostics to pinpoint operation issues. Understanding what each code signals allows you to troubleshoot problems and get your hot water flowing again.
Interpreting Honeywell Hot Water Heater Status Light Blink Codes
The status light on your Honeywell water heater may blink between 1-8 times in a repeating cycle every 3 seconds. Each blinking pattern indicates a specific fault or component failure:
- 1 Flash – Normal operation
- 2 Flashes – Low thermopile voltage
- 3 Flashes – Internal component fault
- 4 Flashes – High temp limit reached
- 5 Flashes – Failed water temperature sensor
- 6 Flashes – Water leakage detected
- 7 Flashes – Electronics failure
- 8 Flashes – Control module not powered
Pinpointing the failed part based on status light blink codes is the crucial first step toward making repairs.
Decoding Honeywell Water Heater Status Light Flash Code Meanings
The status indicator provides real-time diagnostics on the function of internal components. Here’s an overview of what each light flash code signals:
1 Blink Every 3 Seconds
- Indicates normal flame sensor operation and proper burner ignition
- Signals the pilot light and heating system are working correctly
- No troubleshooting action needs to be taken
2 Blinks
- Typically signals low voltage output from the thermopile sensor
- Thermopile generates electric power to operate the gas valve for heating
- Loose thermopile connections can also cause low-power
- Indicates the gas valve may not be opening fully
3 Blinks
- Points to faulty condensate drainage, vent blockage, or draft pressure issues:
- The clogged condensate drain system
- Blocked exhaust vent piping
- Failed draft pressure switch monitoring vent performance
- The specific component at fault must be inspected and repaired
4 Blinks
- Signals the water heater has reached its temp safety shutoff point
- Typically caused by:
- Defective water temperature sensor providing false readings
- Improper high limit set point needs adjustment
- Gas valve or burner issues leading to overheating
5 Blinks
- Indicates the water temperature sensor that monitors outbound water temp has failed
- Sensor failure can happen due to:
- Corrosion from moisture penetration
- Excessive heat damage
- Separation of probe components
- An electrical short in the wiring
6 Blinks
- Signals that an accessory module has detected water leaking from the inner tank
- Fittings, pipe connections, valve stems, or tank seams should be checked thoroughly for leaks
- Can also indicate main burner failure
7 Blinks
- Points to an electronics malfunction with the control module or gas valve itself
- Issues with internal circuit boards, wiring defects, or components overheating
8 Blinks
- Indicates no electric power getting to the control module to operate water heating
- Typically caused by:
- Loose wiring connections
- Shorts in wiring between components
- Flammable vapor sensor resistance out of range
- Control module circuit board defects
So in summary, blinking status light codes allow precise diagnosis of failed parts preventing normal operation.
Fixing a Honeywell Hot Water Heater Status Light That Keeps Blinking
With clear insight into the specific issue based on blink patterns, targeted troubleshooting and repairs can proceed. Solutions will differ based on each fault code:
1. Status Light Blinks 1 Time
- No action required, as this signals normal operational function
- Allows the pilot light and burner to continue heating water
2. Status Light Blinks 2 Times
- Inspect the thermopile sensor and wire connections for defects:
- Check that wire leads are tight
- Verify secure component attachment
- Replace thermopile if large deviations or defects found
- Using a multimeter, check voltage output with the pilot on:
- The acceptable range is 650-850 mV when hot
- If the voltage is lower, replace the thermopile sensor
- Inspect the gas valve operation
- Verify electricity & gas flow when heat is called
- Repair or replace the valve if issues found
3. The Status Light Blinks 3 Times
- Inspect condensate drainage underneath the unit
- Clear any debris preventing water flow
- Check exhaust vent piping
- Remove blockages preventing ventilation
- The draft pressure switch is the most likely culprit
- Have a technician verify the switch operation
- Replace component if found defective
4. The Status Light Blinks 4 Times
- Replace the water temperature sensor probe:
- Locate the sensor wired to the control board
- Disconnect wiring and mounting hardware
- Install new probe tightly with sealant
- Reconnect electrical hookup
- Adjust high temp limit set point between 120-140°F
- For limit lockouts:
- Rotate the temp dial to “pilot” for 1 minute
- Slowly step through the dial settings to reset
- Return dial to normal operating range
5. Status Light Blinks 5 Times
- Replace the water temperature sensor:
- Turn the power off and drain the tank
- Detach and remove the sensor probe
- Install replacement part with wiring
- Refill tank and verify normal operation
6. The Status Light Blinks 6 Times
- Thoroughly check all fittings, seals, and joints for water leaks
- Repair leaks from worn washers, cracks, etc.
- Consider total replacement if tank leaks detected
- Remove and inspect the main burner
- Clear any debris clogs
- Reassemble with new gaskets
7. Status Light Blinks 7 Times
- Carefully inspect wiring connections from components
- Check for a secure fit
- Repair any damaged leads
- Consult the wiring diagram to verify harness colors & pinouts are accurate
- The multimeter checks flammable vapor sensor resistance
- Consult resistance range chart
- Replace sensor if out of normal range
- If no wiring issues are found, replace the gas valve
8. Status Light Blinks 8 Times
- Verify tight wire connections at interface terminals
- Check wiring for shorts causing voltage drops
- Multimeter check flammable vapor sensor
- Resistance should be 9-25 ohms at room temperature
- If no issues are found, replace the control module board
Honeywell Customer Support:
FAQs About Honeywell Hot Water Heater Blinking Lights
Getting familiar with the meaning behind cryptic blinking light codes is key to diagnosing and repairing hot water heater problems. Here are answers to common troubleshooting questions:
What does it mean if my Honeywell status light blinks 3 times?
- 3 flashes indicate an internal component failure such as a clogged condensate drain, blocked exhaust vent, or failed draft pressure switch. Inspect and repair the specific failed part.
Why does my water heater keep blinking 4 times?
- 4 blinks mean the high-temperature limit was reached. Check the water temperature sensor, limit switch set point, gas valve operation, and other heating components for faults allowing overheating.
My pilot light keeps shutting off – what should I check?
- Frequent pilot light shut-offs are often due to a faulty thermopile not generating sufficient electric voltage to operate the gas valve, contamination in the pilot orifice, a defective igniter, or combustion air intake blockage.
What causes the status light to blink 2 times?
- 2 flashes signal low voltage output from the thermopile or an issue with the gas valve not opening properly to allow gas flow. Check both these components for problems.
How do I reset when my water heater is stuck in lockout mode?
- To exit limit lockout when the status light stops blinking, rotate the temperature dial to pilot for 1 minute, to very hot for 10 seconds, to hot for 10 seconds, and then back to the normal operating range.
Why does my Honeywell heater keep shutting down with 7 blinks?
- 7 flashes indicate an electronics failure in components like the gas valve, circuit boards, or internal wiring connections. Inspect wiring and replace any parts found defective.
What should I do if the leak detection alarm goes off with 6 blinks?
- Carefully check fittings, pipe connections, valve stems, and the tank itself for any sign of water leakage. Also, inspect the burner for obstructions. Make repairs and clear debris as needed.
My status light blinks 8 times – what’s the issue?
- 8 blinks typically signal no electric power getting to the control module circuit board. Check wiring for loose connections or shorts preventing voltage. If the wiring checks out, replace the module board or flammable vapor sensor.
More Useful Guides:
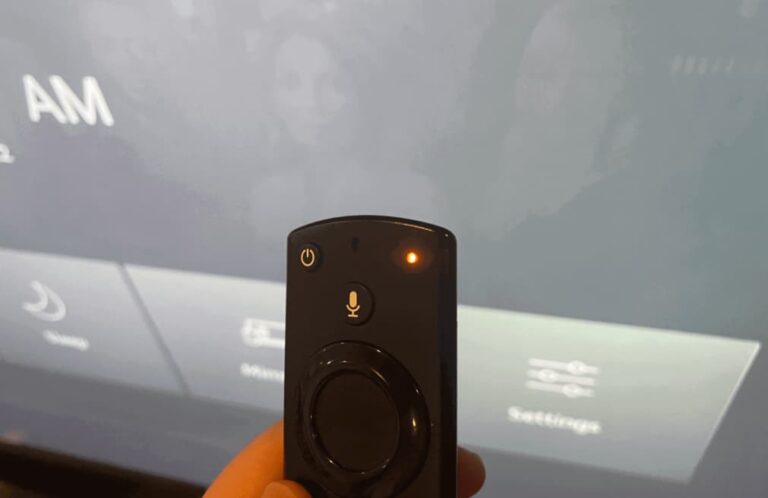
- Why is My Firestick Remote Blinking Orange
- Why Your Ninja Blender Power Light is Blinking Red
- Why is My Polaroid Flashing Orange
- Sonicare Toothbrush Light Blinking Rapidly
Conclusion: Decoding and Fixing Honeywell Hot Water Heater Light Codes
Learning to interpret cryptic blinking status light codes provides insights to accurately troubleshoot hot water heater faults.
- Each flash sequence points to specific operation issues
- By understanding failure meanings, targeted repairs can proceed
- Follow outlined troubleshooting tips and replacement steps for each fault warning
- Getting heat and hot water flowing again
Knowing how to diagnose blinking status indicators allows you to keep enjoying endless hot showers and washes.

