Hey there! Have you noticed that pesky red light blinking on your Samsung TV remote lately? Yeah, I’ve been there too. It’s super annoying when that thing starts flashing at you and then stops working right when you want to watch the big game. Not cool!
But don’t freak out just yet. A blinking red light usually just means there’s a quick fix needed to get your remote functional again.
Whether it’s gunked up buttons, low batteries, or a lost connection, we can troubleshoot this problem pretty easily.
And I’ll walk you through all the possible issues step-by-step so you can get back to channel surfing in no time.
Samsung TV Remote Blinking Red Light
In this post, I’ll cover all the usual suspects for a blinking remote light – stuck buttons, interference, the need for fresh batteries, loss of pairing, and more.
We’ll tackle the quick fixes and also when it makes sense to just replace the darn thing. My handy tips will save you from having to search every website to piece the solution together yourself.
Who has time for that anyway, am I right??
Alright, let’s get that remote blinking red light fixed and have you clicking happily again!
Possible Reasons Behind the Blinking Red Light
There are a few common culprits for a Samsung remote that blinks red:
- Low or dead batteries – The simplest cause is that the batteries need to be replaced. As batteries start to die, connectivity and responsiveness suffer.
- Stuck buttons – If a button gets jammed depressed, it can cause the remote to blink red to indicate something is wrong.
- Loss of pairing – The remote may have become unpaired from the TV, interrupting communication.
- IR interference – Strong light sources or obstructions blocking the IR sensor on the TV can prevent connectivity.
Knowing the potential sources of the issue will help you systematically troubleshoot and eliminate each one.
Step-by-step fixes for a Blinking Red Light:
Try these troubleshooting steps to fix your Samsung TV remote:
1. Replace the Batteries
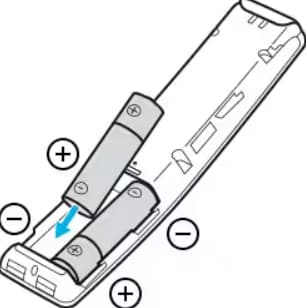
The first thing to try with any remote control issue is putting in fresh batteries:
- Turn the remote over and open the battery cover.
- Remove the old batteries and discard them properly.
- Check for corrosion or damage inside the battery compartment – clean contacts gently with a cotton swab and rubbing alcohol if needed.
- Insert 2 new, high-quality AA alkaline batteries, making sure the polarity matches the diagram inside.
- Replace the cover and test the remote.
If replacing depleted batteries fixed your blinking red light, you’re all set! If not, move on to the next steps below.
Tip: Consider investing in rechargeable batteries and a charger to reduce waste and save money in the long run with your remote.
2. Check for Stuck Buttons

Examine the external buttons for any that remained stuck in the depressed position. Carefully press the stuck buttons to release them. If that alone doesn’t work:
- Remove batteries first to avoid unwanted input.
- Use a toothpick, paperclip end, or cotton swab to press down any stuck buttons many times, releasing them fully.
- Visually inspect buttons, pressing each firmly a few times to ensure smooth motion.
- Replace batteries, sync remote if needed (see Step 5 below), and test buttons.
Freeing up stuck buttons often resolves erratic red blinking remote behavior. If the problem persists, you’ll have to dig deeper.
3. Eliminate Interference
Environmental interference in the IR (infrared) communication pathway between remote and TV could be resulting in blinking red lights.
- Aim the remote directly at the IR sensor on the TV from a few feet away with a clear line of sight. Make sure no furniture or objects is blocking the signal.
- Turn off nearby lights, and eliminate bright sunshine glare on the TV’s IR sensor. Draw drapes/blinds if needed.
- If you use other peripheral IR devices, make sure their signals aren’t interfering. Move their placement if needed.
- Disable CEC HDMI control on the TV if possible. This takes the TV remote out of the device ecosystem chain and gives straight communication from the remote to the TV.
Clearing up pathway obstacles or interference sources restores solid connectivity in many cases, ceasing the blinking red behavior.
4. Power Cycle the Remote
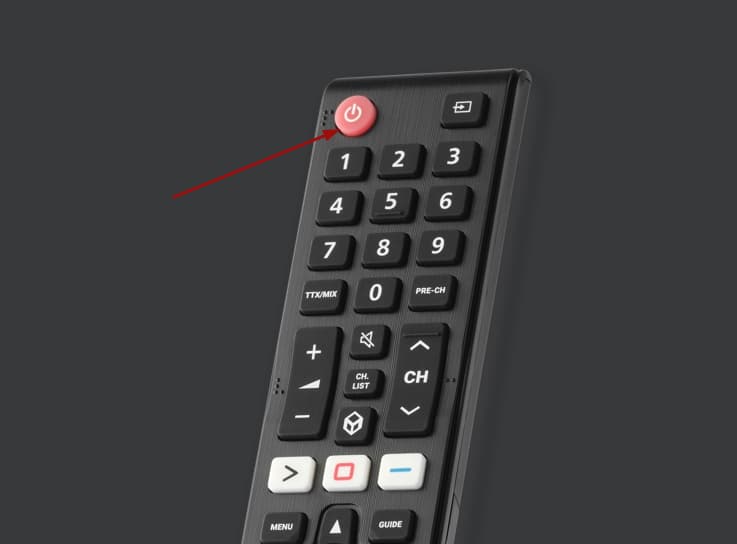
Resetting the remote can clear any corrupted internal firmware states causing issues:
- Take batteries out of the remote.
- Press and hold the power button for 60 seconds to fully discharge internal components.
- Insert fresh batteries.
- Sync remote with TV if there are still issues (see below).
This power cycling for remote electronics forces a cold boot, clearing any software glitches to give a fresh start.
5. Re-pair the Remote with the TV
Over time and use, the remote can lose its paired communication with the TV. Re-linking them syncs up the IR frequency and codes:
- Turn the TV on.
- Stand within a foot of the TV’s IR sensor.
- Press and hold the mute and power buttons simultaneously for 3-5 seconds until the blinking.
- The remote light will blink rapidly when trying to pair.
- When the TV emits an acceptance tone and the remote blinking stops, pairing is complete.
- Test remote buttons and features.
When all else fails, resynchronizing the hardware often resolves persistent remote blinking issues. But if problems continue even after pairing anew, then likely there is permanent damage needing full replacement (Step 6 below).
6. Purchase a Replacement Remote
If you’ve tried every step here to no avail, then your Samsung remote is probably experiencing hardware failure. At that point replacement is the only option:
- For the exact match, find remote model details in the TV settings menus to order from the Samsung parts website.
- Universal programmable models available on Amazon can also substitute functionality.
- Best Buy and other local electronics stores also stock replacement TV clickers.
While not an ideal solution cost-wise, buying a brand new remote is the only way forward when all troubleshooting options to rectify blinking red have been unsuccessful. It’s fairly inexpensive insurance to be able to fully operate your TV again.
Helpful Tips to Care for Your Samsung TV Remote
Implement these remote control care tips to avoid many issues down the road, including blinking red lights:
- Keep it clean – use a small amount of rubbing alcohol on a cotton swab to gently wipe grime off buttons, crevices, and the body.
- Handle gently – drops, impacts, and spills can break inner components. Be careful not to step on it!
- Store safely – keep the remote away from the edges of tables/furniture when not in use to prevent falls.
- Avoid liquids – moisture, especially battery leaks, can corrode contacts and destroy circuits.
- Quickly replace batteries showing any signs of depletion for optimum performance.
- Don’t mix old and new batteries.
- Check under sofa cushions before assuming loss!
Making remote care a regular habit prevents many issues.
Frequently Asked Questions About Samsung TV Remote Blinking Red Light:
Here are answers to some commonly asked questions about rectifying a blinking remote:
- Q: Why is my Samsung remote flashing red?
A: A flashing red light typically signals a loss of connectivity or pairing between the remote and TV. Causes can include stuck buttons, low batteries, interference blocking IR sensors, or the need to resync.
- Q: How do I reset my Samsung remote?
A: Removing batteries for 60+ seconds resets and discharges components. Holding a power button without batteries also works. This forces a power cycle restart to rectify glitches.
- Q: How do I fix the blinking red light on my Samsung TV?
A: Step-by-step troubleshooting tips include replacing batteries, checking for stuck buttons, clearing sensor obstruction/interference, remote power cycling, re-pairing with TV, or buying a replacement remote if still exhibiting issues after other remedies.
- Q: How do I reconnect my Samsung remote?
A: If your remote is unpaired or lost sync with TV, hold the mute+power buttons simultaneously near the sensor to re-establish the connection, stopping most blinking red light problems.
- Q: Why is my Samsung remote blinking and not working?
A: Few possible causes – needs new batteries, buttons failing/jammed, IR sensor obscured, desynced from TV, or hardware components damaged. The above guide details systematic fixes for restoring functionality.
- Q: Why is my Samsung remote suddenly not working?
A: Abrupt remote failure implies a hardware problem – visiting TV settings shows if still paired/connected. Try replacing batteries, power cycle reset, re-pairing with TV, and confirming clear sensor line-of-sight. electrically conductive leaks or corrosion can disable circuits permanently over time.
- Q: Why is my remote not working even with new batteries?
A: Brand new quality batteries ruling out power issues point to hardware failure – stuck buttons, antenna damage, IR obstruction, sensor malfunction, total de-pairing, or sudden components breakdown. Troubleshoot systematically or ultimately replace remote if problems persist.
More Remote Blinking Guides:
- Firestick Remote Blinking Orange
- Xfinity Remote Flashes Green Then Red
- Amazon Fire Stick Remote Blinking Green And Red Lights
- Philips Remote Blinking Orange
Conclusion
While a blinking red light on your Samsung remote can be disruptive and annoying, identifying the exact cause and applying appropriate solutions will help you smoothly operate your TV again.
Methodically stepping through battery replacement, inspection for stuck keys, repositioning elements blocking sensor communication, resetting, and repairing with TV often resolve most straightforward issues quickly.
Implementing ongoing remote maintenance best practices keeps functionality working robustly over the long haul.
But even following careful usage guidelines, electronics can abruptly fail down the road due to flaws or damage.
Thankfully, replacement Samsung remotes are inexpensive and widely available from first- and third-party manufacturers when operational fixes are unsuccessful.
With this comprehensive troubleshooting guide, a functional TV clicker restoring full device enjoyment is just a few steps away!